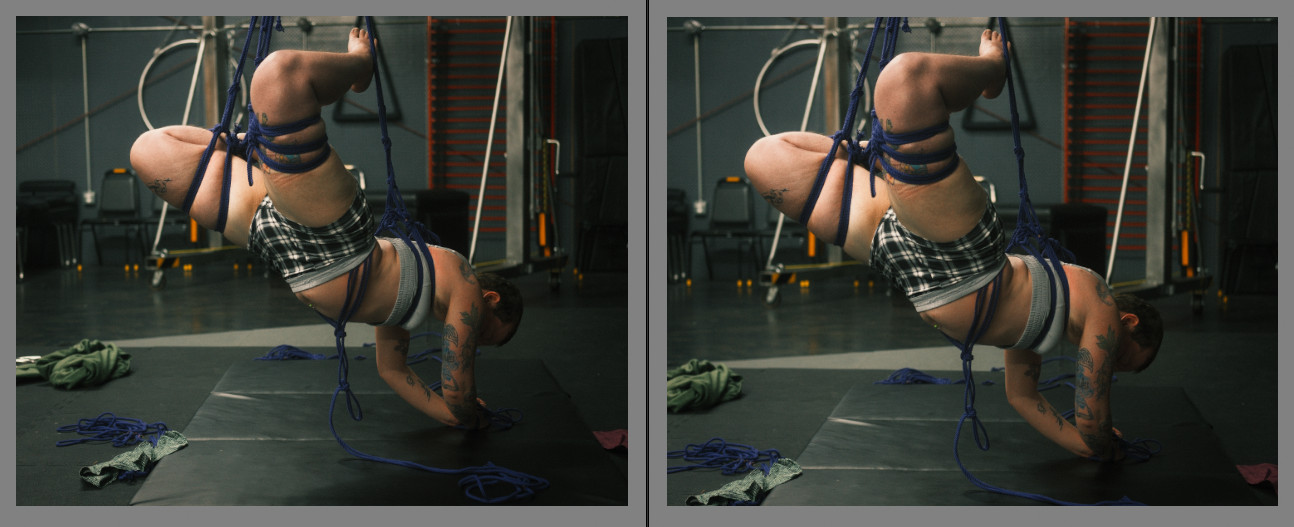
Crop them gently
I'm going to try something new. This is going to be the first of a new series with tips and tricks to make your photography, rope or otherwise, better. Some quick disclaimers: 1) Rules for art are good rules until they aren't. 2) While I am a trained photographer, some things are preference.
Fix your horizons
No matter how careful you were when taking photos, it's askew. Or worse, sometimes it's perfectly level but the perspective makes it seem like it isn't and you have to fake it to make it feel level even. In TV and movies they make the sound of the toilet flushing much shorter than it is in real life because that feels more real. An accurate toilet flush takes too long and doesn't feel real anymore. Horizon lines are like that in photography. A photo might have been taken perfectly level, but if it doesn't feel level because of something in the background it will always feel wrong and off balance.
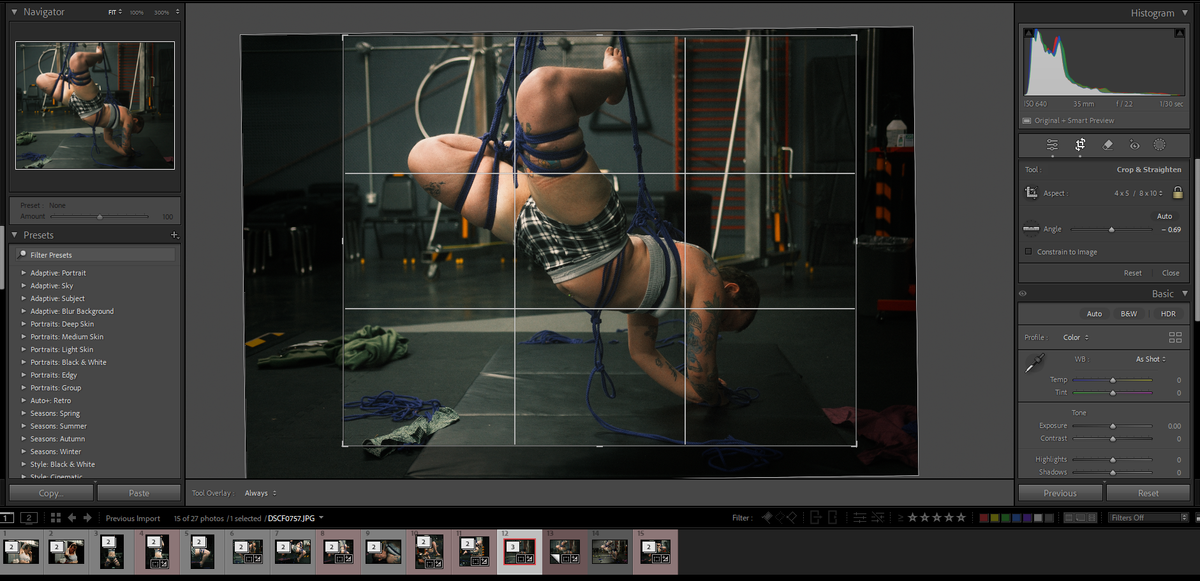
Find a horizontal or vertical line around the middle of your image, usually one in the background for traditional photography. For rope, I often use a primary upline if I have one that should be mostly vertical, or the bamboo or frame itself depending on the kind of place the photo was taken in. Now that you've found your reference line, rotate your image slightly until that line is either perfectly vertical or perfectly horizontal. Most photo editing apps will show a whole graph paper like grid over your whole image when using a rotation tool.
Know your ratios
Where is this photo going? If it's going to Fetlife or some vault in your phone, than the ratios don't matter at all. Crop to your heart's content and skip the rest of this section. If you are posting somewhere or using the photos for something where the ratio matters, than this has to be considered throughout the process because it will affect everything else. For Instagram, for example, you need either a square or 4x5 and that's doubly important if you want to post multiple photos or Instagram will crop as it pleases and mess up a series of perfectly good photos.
Now in a perfect world you would know what ratios you need before you even take the photos, but we rarely exist in a perfect world. Hopefully you at least gave yourself some extra room on the edges. Photography is inherently subtractive as an art form. We can crop in, but going the other way isn't so easy.
Easy mode for this, a lot of apps let you lock your crop ratio. If that's the case, do it. Set your crop ratio to what you need and then adjust everything else with that crop ratio locked. If the app you are using doesn't have this lock feature, just make sure that as you go on and make other adjustments, you do so in a way that maintains your carefully selected crop ratio. Nothing worse than spending ages working on a photo only to realize that you don't have the ratio right for what you need and have to start over. Best to figure it out early and keep it in mind throughout the process.

Rule of thirds
In almost any editing app from Photoshop to Snapseed the crop tool will pull up this lovely little grid of third lines. There are numerous articles and tutorials centered around the rule of thirds, and for good reason. The rule of thirds is really two things in one, and it is by far the most abstract of the things I'm going to talk about here today. Elegant application of the rule of thirds can subtly shift a photo from decent to great.
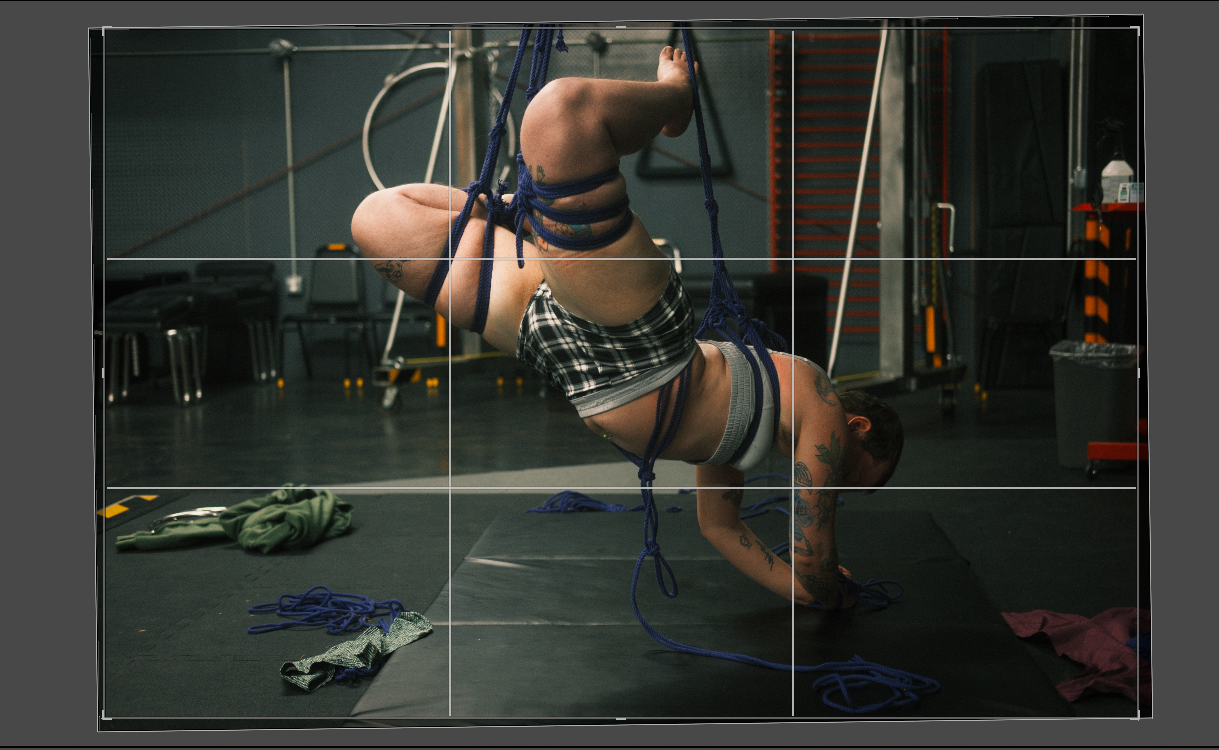
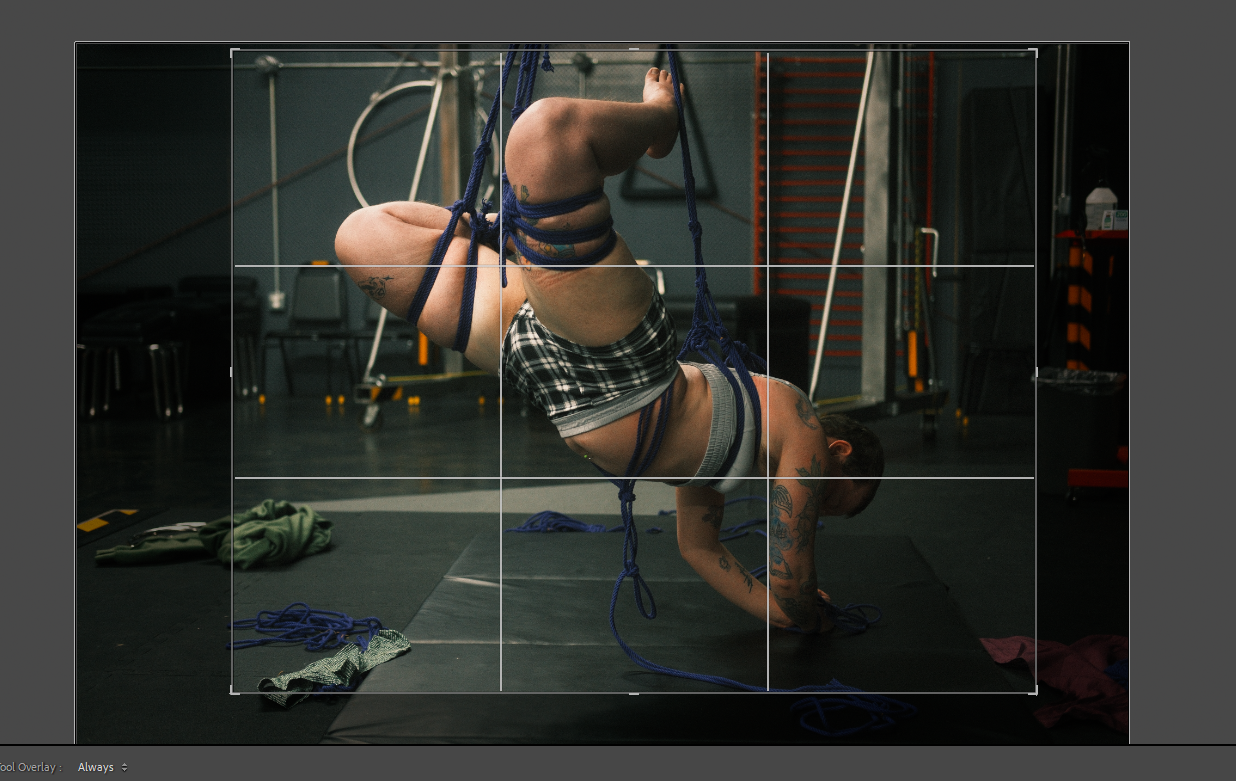
Part 1 of the rule of thirds, the actual third lines draw the eyes attention. Shifting your crop so that someones lips are on the third line instead of their eyes can shift the whole feel and weight of an image. The points where the horizontal and vertical thirds lines cross are double focal points. Put the points you want the most attention on here.
Part 2 of the rule is that images balance well when divided into thirds. Think of a picture of the beach. More likely than not, the image you have in your head had the bottom being sand, the middle being ocean, and the top being sky all neatly divided into thirds. With rope you can often do similar things letting the body fill up one or two thirds and the upline or other features of the space fill the rest. Shift your crop around until the large sections of the photo fit loosely into thirds.
For now, just play with this and see how you like it. If you want to deep dive and think about this part while taking photos, there are a lot of people on the internet that have explained this in far more detail than I have given here.
Don't cut their fingers off
You've taken a lovely photo but when you fixed your horizons or ruled your thirds you weren't paying attention and now they edge of the frame is neatly dissecting their fingers from the rest of their hand. The rest of the photo looks fine, great, excellent even but you can't shake the feeling that something is off about it. Uncanny valley even.
That's because, when you crop at a joint the entire proportions are thrown off. There is nothing for the eyes to hold onto, nothing to anchor the proportions and so they seem to extend on forever. Drifting past the edge of the image into unknown space. You know they should stop, but the spot where they should turn into something else has been abruptly truncated leaving your subconscious confused and upset.
Crop in the middle of a body part rather than at a joint. Instead of wrists or elbows or shoulders, crop mid forearm or bicep. Instead of cropping at the hips or knees or ankles, crop mid-thigh or mid-calf. You get the idea. Oh and please, please, don't cut their head off. If you don't want their face in the photo for one reason or another leave at least the jaw line. People start looking like poultry if you crop their heads off at their necks.